


Jedi Survivor Best Controller Settings and Tips for Beginners

T2023 is shaping up to be one of the greatest years of all time for franchise RPG games. First Hogwarts Legacy blew us all away and now Jedi Survivor is here! This game is incredibly fun, beautiful, and gripping from the moment you start. To help you get the most out of your first play session, so you don’t get bogged down in the menus or stuck on a quest step, check out this list of settings and tips to get you started on your epic journey with Cal Kestis and his friends!
The Best Grip in the Galaxy
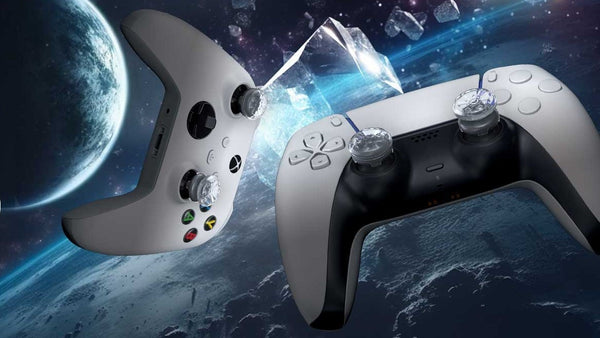
A Jedi’s lightsaber isn’t just a tool that they control, it’s like an extension of their arm. If you want to feel the same connection with your controller, upgrade it with a pair of Crystal Galaxy Performance Thumbsticks. These mixed-height thumbsticks feature the classic Galaxy laser-etched design on our most grippy material, but are completely clear, making these the perfect upgrade to improve your game and make your controller shine like a powerful kyber crystal! We normally recommend two low-rise or mid-rise thumbsticks for RPG games, but these Crystal Galaxy sticks are too grippy. We are currently rocking one Mid-Rise Crystal Galaxy on the left stick and one Mid-Rise Black Galaxy on the right stick for that lightside/darkside look!

Catching Up with Cal
It’s been 3 years since Jedi Fallen Order was released, but five years have passed in the story since we last saw Cal take on Cere’s apprentice in the Fortress Inquisitorious. If you didn’t play Fallen Order or you just need a refresher, Jedi Survivor actually recaps the events of the first game in a unique and engaging way, so you don’t have to worry about not being up to speed. The game does a great job of catching you up before dropping you into the action.

Settings
Before we jump into the game though, as always, we need to take a look at our settings to make sure the gameplay, audio, visual, and accessibility options align with the experience we want to have. Jedi Survivor guides you through some of these major settings decisions in the intro, so be sure to pay attention, but also know that you can always go back and change these selections later on.
Full disclosure, we are not Dark Souls roly-poly champions, so we like to play the game on Jedi Knight difficulty, which is the default. We even turn down the difficulty to Padawan if we’re running out of stims, because our primary goals are to progress the story, gather experience to level up, and continue amassing collectibles. So we want to avoid losing progress whenever possible. That said, combat in this game is a lot of fun and if you are looking for a challenge, conquering the harder difficulties can be very rewarding, if time consuming.
Select the audio input appropriate for your setup and turn subtitles on or off to your preference.
Adjust the brightness to your screen and eyes, and we recommend playing on Performance Mode for PS5 or Xbox as this will lock you in at 60 FPS which will make jumping puzzles and combat more consistent.
Set the View Distance to the screen that you use, whether it’s a monitor or TV. Also turn off Ambient Camera Sway as this can be distracting and doesn’t add value, in our opinion.
Field of View is a great new feature that can take advantage of next-gen graphics and performance mode to enable you to see more of the map around Cal. Turning this up to Wider or Widest will make some of the platforming puzzles and combat easier.
Before you start your New Journey, you’ll be prompted to turn on/off a few features like Force Interaction Hints, Navigation Hints, and Dialogue Skipping. We turned all of these on, because as previously mentioned, we are more focused on leveling up and story progression over immersion and combat and these settings will help prevent us from getting stuck or wasting a bunch of time in one area.

In the rightmost tab of the start menu, there are even more settings that you can adjust. In the Visuals options, we’re going to turn Camera Shake all the way off and let’s double check that our Field of View is set to Wider or Widest.
The Stabilizing UI Dot can be helpful for motion sickness or aiming the camera, but unfortunately, it remains on the screen during cutscenes, so we recommend leaving this off.
Scrolling down to Gameplay Settings, we recommend turning Auto-switching target on enemy death on. This will enable your jedi senses to lock on to enemies even when they are outside of your field of view!
We also recommend turning Auto-lock target in combat on. Locking on to targets makes it easier to parry and evade their attacks so it’s generally recommended to lock on whenever possible, but you can always remove this lock on by hitting the right joystick.
Turn Disable Fall Damage off. This will make it so that when you die to fall damage, you don’t respawn with less health than before. This will help you a lot in the early stages of the game when stims are sparce and your health bar is valuable.
Toggle Hold-Pull is an incredible feature that enable you to pull, hold, and activate objects with one trigger pull, rather than having to hold the trigger, so we recommend turning this on.
Navigation Assist, as previously mentioned, we turned this on, because it enables us to locate objectives and puzzle pieces quicker.
We turned Camera Follow Lock Down to 30%, but we’ll play around with this as we are playing to find what feels natural.
Human Dismemberment and Arachnophobia Safe Mode are both there to protect gamers from any content that they might want to avoid.
There are a number of other Accessibility features like Slow Mode, Navigations Assist Ping, Puzzle Assist, and Shortcut Controls. We played around with all these features and found that they we’re not necessary. If you are having trouble with combat, you can turn the difficulty down, or if you really don’t want to do that, you can turn on Slow Mode to give yourself more time to react to enemies. The assist options can be turned on if you are stuck on a puzzle but with Navigation Assist on, you likely will not need any of the pings, and the sounds can be distracting, so we recommend leaving most of these settings off, but you should play around with them and see if any of them are worth incorporating into your game to get the experience you are looking for.

Next up, let’s look at the Controls Settings. We turn vibration all the way off because our controller doesn’t have vibration modules. Same thing for trigger effect function. You may want to turn this on depending on what controller you are using. We set the Controller Look Sensitivity for X and Y to 6. This enables us to do that quick and consistent 180 degree turn that we are looking for, while still being able to accurately target enemies and objects with the right stick. This is where those Galaxy Performance Thumbsticks really enhance your game. The smaller arc distance of the thumbsticks due to the added height reduces hand strain over long gaming sessions, making your controller’s thumbsticks always feel like they are perfectly connected to your thumbs through the force!
In the Visual settings, let’s start by making sure Performance mode is on and Field of View is set to Wider or Widest.
We recommend turning Motion Blur, Film Grain, and Chromatic Aberration off.
Camera Shake and Ambient Camera Sway should both be off.

Tips for Beginners
Jedi Survivor does a great job of letting you play the way that you want to. If you are struggling with combat, turn the difficulty down. If you are struggling with a puzzle, turn on Nav Assist or even Nav Assist ping to help you find your objective, or listen to BD-1 when he offers tips.
Explore all corners of the maps for collectibles and make note of collectibles that you will need to return to get once you have another ability, tool, or force power. There are so many more collectibles and customization options for Cal, BD-1, Mantis, your lightsaber, and more that you don’t want to miss!

Focus on skills that enhance your play style. If you are playing on higher difficulties and struggling to maintain your health, invest skills into survival. If you are playing on a lower difficulty and want all of the force powers, focus on acquiring those and expanding your force meter.
We’ll be releasing another blog soon with additional tips about force powers and skills to acquire early on. So stay up to date with our other KontrolFreek Blogs. Be sure to follow us on Twitter, Instagram, and TikTok for the latest gaming content and join our Twitch streams for some always entertaining gameplay and opportunities to win free KontrolFreek and SteelSeries products!


